Friday, March 25, 2011

4AGZE + Microtech MT8

Another project..just started...a 4AGZE with Microtech MT-8


Owner bought the MT-8 ECU alone so it was quite hard to find new socket+pins for the Microtech. My idea is to ease installation and less downtime. So a plug and play harness is the better option for him.A friend of mine sourced the Toyota ecu connector and i sourced the Microtech connector.

Few hours later...the plug and play harness is finished, however there is a few problems as the factory 4agze wiring runs the injector in groups,since i don't know the mapping and settings inside the MT-8,i just pulled extra wires for it to run on sequential injection in case i cannot switch it to group fire,which means i need to pull an extra wires to each injector.


Microtech! Choice of champions.. :-)

Update: Just plug it in the car,it wont start,the rpm does not show on the hand controller...check the wiring,swapped the crank trigger input and it finally fires up,but was running on 2 cylinders,scratching my head again...

I checked the ignition wirng and coils,tried the ignition test,only 1 coil fires.Swapped the ignition output from the MT-8,also the same coil fires..so the MT-8 was good,now its on the igniter.The 4AGZE was running on factory igniter,i suspect the igniter wont fire both coils from any other ecu except stock.A mitsubishi GSR igniter was used to test and then...yeayyyy...it fires up nicely,idle is ok but need to touch up on the cranking..

Next is to tune the car and see how many horses she got..The engine is lightly modded with larger crank pulley and extractor.

E-manage Plug and Play harness + OTR tuning..

A friend of mine ask me to make a plug and play harness for his Blacktop 4AG.
He supplied the jumper harness and the e-manage main+ignition harness


Finished Plug and play harness...

Plug and play means you dont need to cut the factory wiring,and installation and removal is quick.Plug it in the car and we went for a tune on the road with wideband O2..

Silvertop to Blacktop ECU conversion

Another SVT to BT ecu conversion, this time is a Toyota LE with 20v Silvertop engine......the owner saw this blog and interested to convert his wiring too,he's having a few problems with idling and the Check engine light was on..so...straight to the job..


Soldering process on the 22pin socket inside the car..

Finished wiring and connecting the ECU..ready to roll..


The engine,airflow meter have been romoved but retaining the stock airbox,battery being charged because it was weak after 2 days..


Another view of the engine...Job finished..Owner happy with the performance


And Yeah....Garage Daz and RNR Autosport presents..

CAMPRO 4 throttle 200hp..hahaha,watch out VTEC..

Monday, March 7, 2011

Update #1

Have'nt update my page for quite a while...

I have been a bit busy over last month and this month due to some family programs. There are a few projects going on for now;

1.Another silvertop to blacktop wiring conversion on LE (Done-will update soon)
2.4AGZE with Microtech (Install and tuning- In progress)
3.20v Blacktop with E-manage (Install and tuning - Done)
4.4AGE 16V with Haltech Platinum Sport 1000 (Install and tuning - Not yet started)
5.20v Blacktop with Freedom ECU+DLI (Install and tuning - Not yet started)

Will update the progress of these projects...

Tuesday, December 28, 2010

Toyota Oil Filter

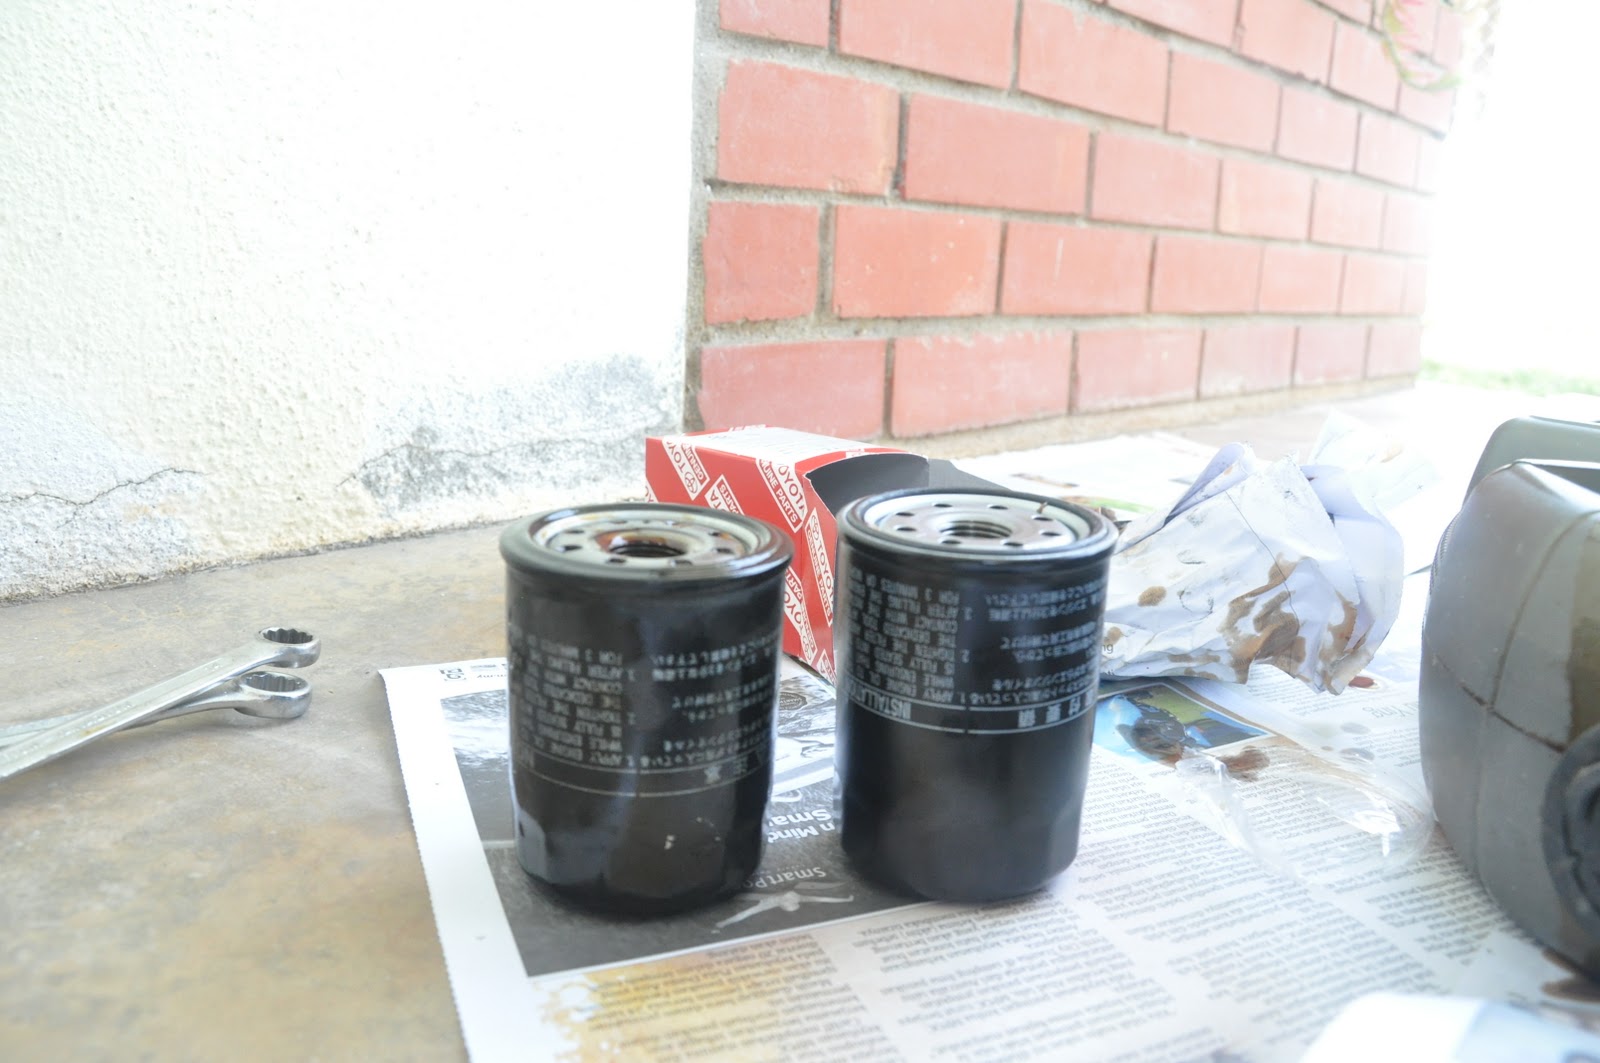
Nowadays there are many counterfeit items, automotive spare parts included. It is somewhat amazing how they managed to copy those spare parts almost exactly like a genuine parts, and sometimes it is very hard to tell the difference.I came across these oil filters last weekend.I am not sure whether both are original because that is what i asked for when buying it.
The one on the left is used (bought approx 6 months ago). On the right is the new oil filter, both filter are bought at the same spare parts shop,both have same price and same part number (90915-YZZE2).Both says made in thailand.

However,the filter on the left is shorter than the one on the right,the writing on the left filter is lesser quality and less sharp,but it says the same thing.Note the position of the printing as well,the right one is closer to the filter mating surface.

The thread position is also slightly different.The right one is closer to the mating surface while the less is slightly 'deeper'.

SO...which one is the original one,could it be both are original but different batch,could be the one on the left is the counterfeit filter or could it be the one on the right,who knows...perhaps UMW Toyota can answer this.

AE101 SEG 4AFE to AE111 20 Valve Blacktop Swap.

Once again,my partner and good old friend of Garage Daz,trusted me to pull this project off. The car is AE101 SEG, Malaysian Domestic Model (MDM) with 4AFE engine. Owner have bought a crate AE111 20v engine,it comes with 6 speed transmission from Toyota Carib.The engine ecu is included but the wiring is in a really bad shape,it have being cut off by the Auto Supply Shop but he did'nt mind that as he bought the engine dirt cheap...so now it's up to me to graft the AE111 blacktop engine wiring with the AE101 SEG.
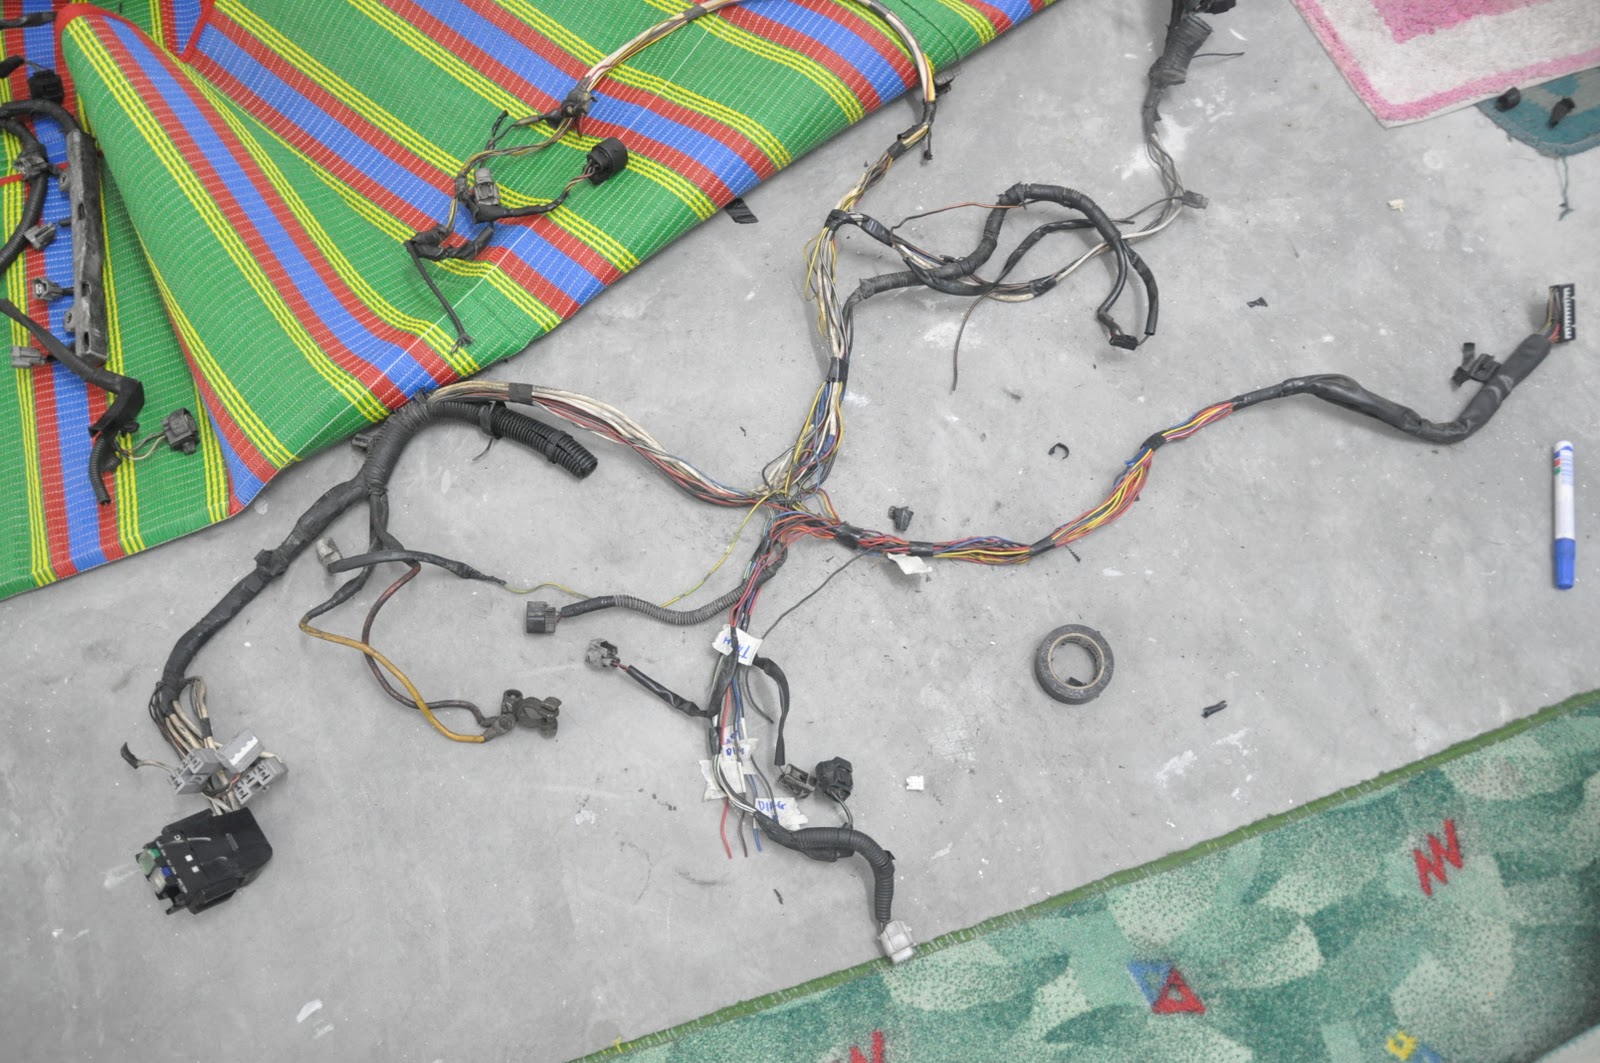
This is the stock AE101 MDM 4AFE engine wiring.The car now is almost 18years to the wiring is not really in a good shape,all the connectors are cracking and brittle and the insulation tape is falling off.

Here is the AE111 20Valve Blacktop engine wiring,this will be grafted into the AE101 engine wiring,taking all the necessary wires to run the engine.


AE101 wiring is being stripped off its insulation.


Unnecessary wires are cut and removed, leaving only the vital to the engine operation. Since most FWD Corollas have the starting,charging,a/c and ignition key power supplies run together with the ecu wiring,it is important to separate those things and know which one need to be removed,which is to be maintained,and which is to be grafted with the new wiring.On conversion like this,the big problem would be the air conditioning system,as different generation of Corollas having different air conditioning system.

Seen here the AE111 ecu wiring is placed on top of the AE101 wiring. Grafting session will begin. All wires are soldered and shrink wrap as usual.


Nearly finished,wrapping it with corrugated tube and insulation tape.


Finally,the finished wiring,all routing of the wires follows stock location on the AE101 SEG. One more ecu connector to be grafted inside the car to complete this conversion.


The 4AGE 6speed MT ecu, seen here attached to the wiring for trial start up.


Engine bay view.All the mechanicals are done by Garage Daz.These guys are really pro in 20Valve conversion,engine swap like this only 2 days!


Garage Daz chief mechanic - Mr Imran together with Garage Daz logistic and spare parts dealer - Mr Awai

STI Engine Oil Change

I was free on Sunday so i take the opportunity to do an oil change to my STI.Prepared the tools and stuff, it;s time to get dirty..
Remove the underside cover,five 12mm bolts holding it up..

Now the oil filter and drain plug is visible, remove the drain plug and let the engine oil drain into a pan,i use old engine oil container to catch the old engine oil.Then the oil filter is removed by using oil filter wrench,make sure there is a pan to catch the oil coming out from the filter.


Wait until the oil drain is complete,then screw back the drain plug.It is advisable to change the drain plug washer as well. Put new oil filter in,and pour the new engine oil,i'm using Mobil 1 Full Synthetic 5W50. The STI using 4.5 Litres of engine oil (with an oil filter change).After all is done,start it up and see for any leaks,re-check the oil level and its all good to go.